Introduction
Before explaining how to create a contact form with Google for your website, I need to make a necessary preface because it is a creative solution that I had to implement in a specific situation.
Recently, I switched to the Jekyll + Netlify combo to deploy static sites. Among the advantages of this approach are:
• Easy to develop and flexible
• Super fast loading time
• Scalable architecture
• Reliable hosting
• Secure
Problem
Netlify allows you to create a working HTML contact form simply by using the tags found in their documentation. I tried it in the free version, and it is an excellent service. After about 100 contacts per month, the upgrade to a pay-as-you-go subscription is automatic. However, not all clients are willing to pay monthly to receive emails from their site.
There are several third-party services for creating contact forms:
• https://www.formstack.com
• https://www.jotform.com
to name a few. These services have limitations that can be unlocked by subscribing to a monthly plan.
Many clients do not have enough user traffic to justify these expenses, so I had to look for a free solution. There are many, for example, I could use PHPMailer and create my own email sending service, but to do so, I need to upload the package to a server and then manage the service, which requires time and resources.
Solution
Therefore, I chose to use Google Forms to create a questionnaire to use as a contact form and Google Spreadsheets to store the responses and send an email to the administrator whenever someone fills out the form on their site.
Creating a Contact Form with Google for Your Website
To create a contact form with Google for your website, the first thing to do is create a questionnaire at this link and click on Create a new blank form (you need to have a Google account):

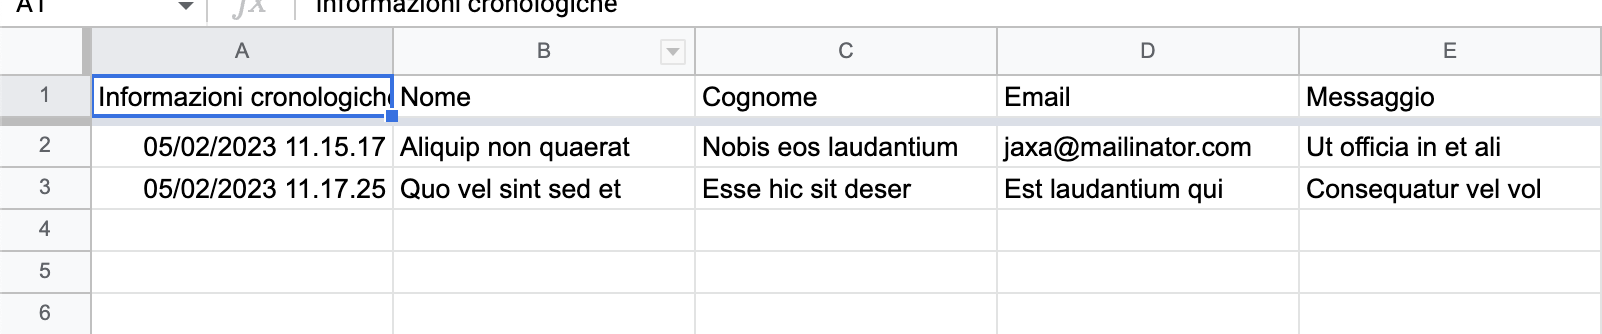
Once the fields of our questionnaire are defined, we can click on Responses, the options menu with three dots at the top right, and then on Select response destination. This will allow us to save the responses in a Spreadsheet. A menu with two options will open, choose the first one and assign a name to the worksheet. Click Create.


The worksheet has been created and linked to the questionnaire. To view it, go back to the Responses tab and click on the Google Spreadsheet icon.
Email Sending
What we need to do is notify the site administrator whenever someone fills out the form on our site (we’ll see how to integrate it later). To do this, we will use App Scripts, a scripting platform developed by Google.
From our response spreadsheet, click on Tools → Script Editor
The script editor linked to that spreadsheet will open:
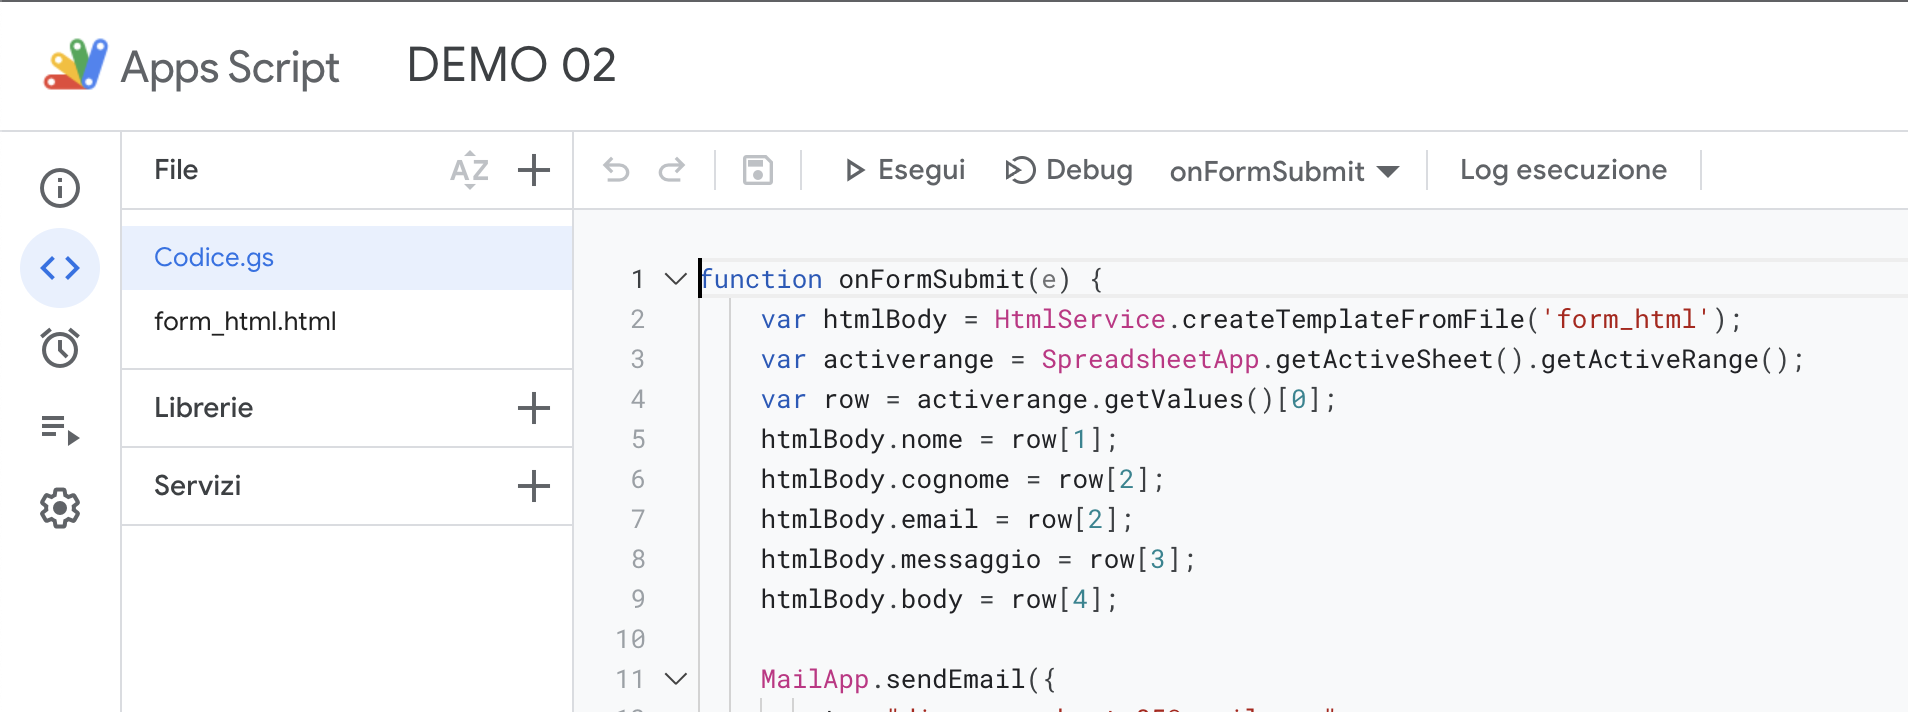
Our script consists of two components:
- Code.gs — This is where the email sending occurs
- form_html — This is where we format the email
The code is very simple: it takes the row that is activated when the sheet is updated with each new contact and extracts the data we want to send by email from that row. Then we will use the MailApp class and the sendEmail method to send the email. Here is the code, you can copy and paste it, modifying the recipient’s email and the fields to be used.
function onFormSubmit(e) {
    var htmlBody = HtmlService.createTemplateFromFile('form_html');
    var activerange = SpreadsheetApp.getActiveSheet().getActiveRange();
    var row = activerange.getValues()[0];
    htmlBody.nome = row[1];
    htmlBody.cognome = row[2];
    htmlBody.email = row[2];
    htmlBody.messaggio = row[3];
    htmlBody.body = row[4];

    MailApp.sendEmail({
        to: "**************@gmail.com",
        subject: "Nuovo contatto dal sito",
        htmlBody: htmlBody
    })
}
To create the email template, click on File → New → HTML file and give it a name (remember it must match the name passed to the htmlBody variable (line 2).
You can format the template as you like; the dynamic fields of the email must be written with the same names you used in the previous script and are those enclosed by the tags
<!DOCTYPE html>
<html>
  <head>
    <base target="_top">
  </head>
  <body>
    Nome : <? =Nome ?>
    Cognome : <? =Cognome ?>
    Email : <? =Email ?>
    Messaggio : <? =Messaggio ?>
  </body>
</html>

Once the template is formatted, save and go to Code.gs and click the Play button: this will provide the necessary permissions for the script to send the email. Remember that if you make any changes, you need to click the Play button again.
Creating a Trigger
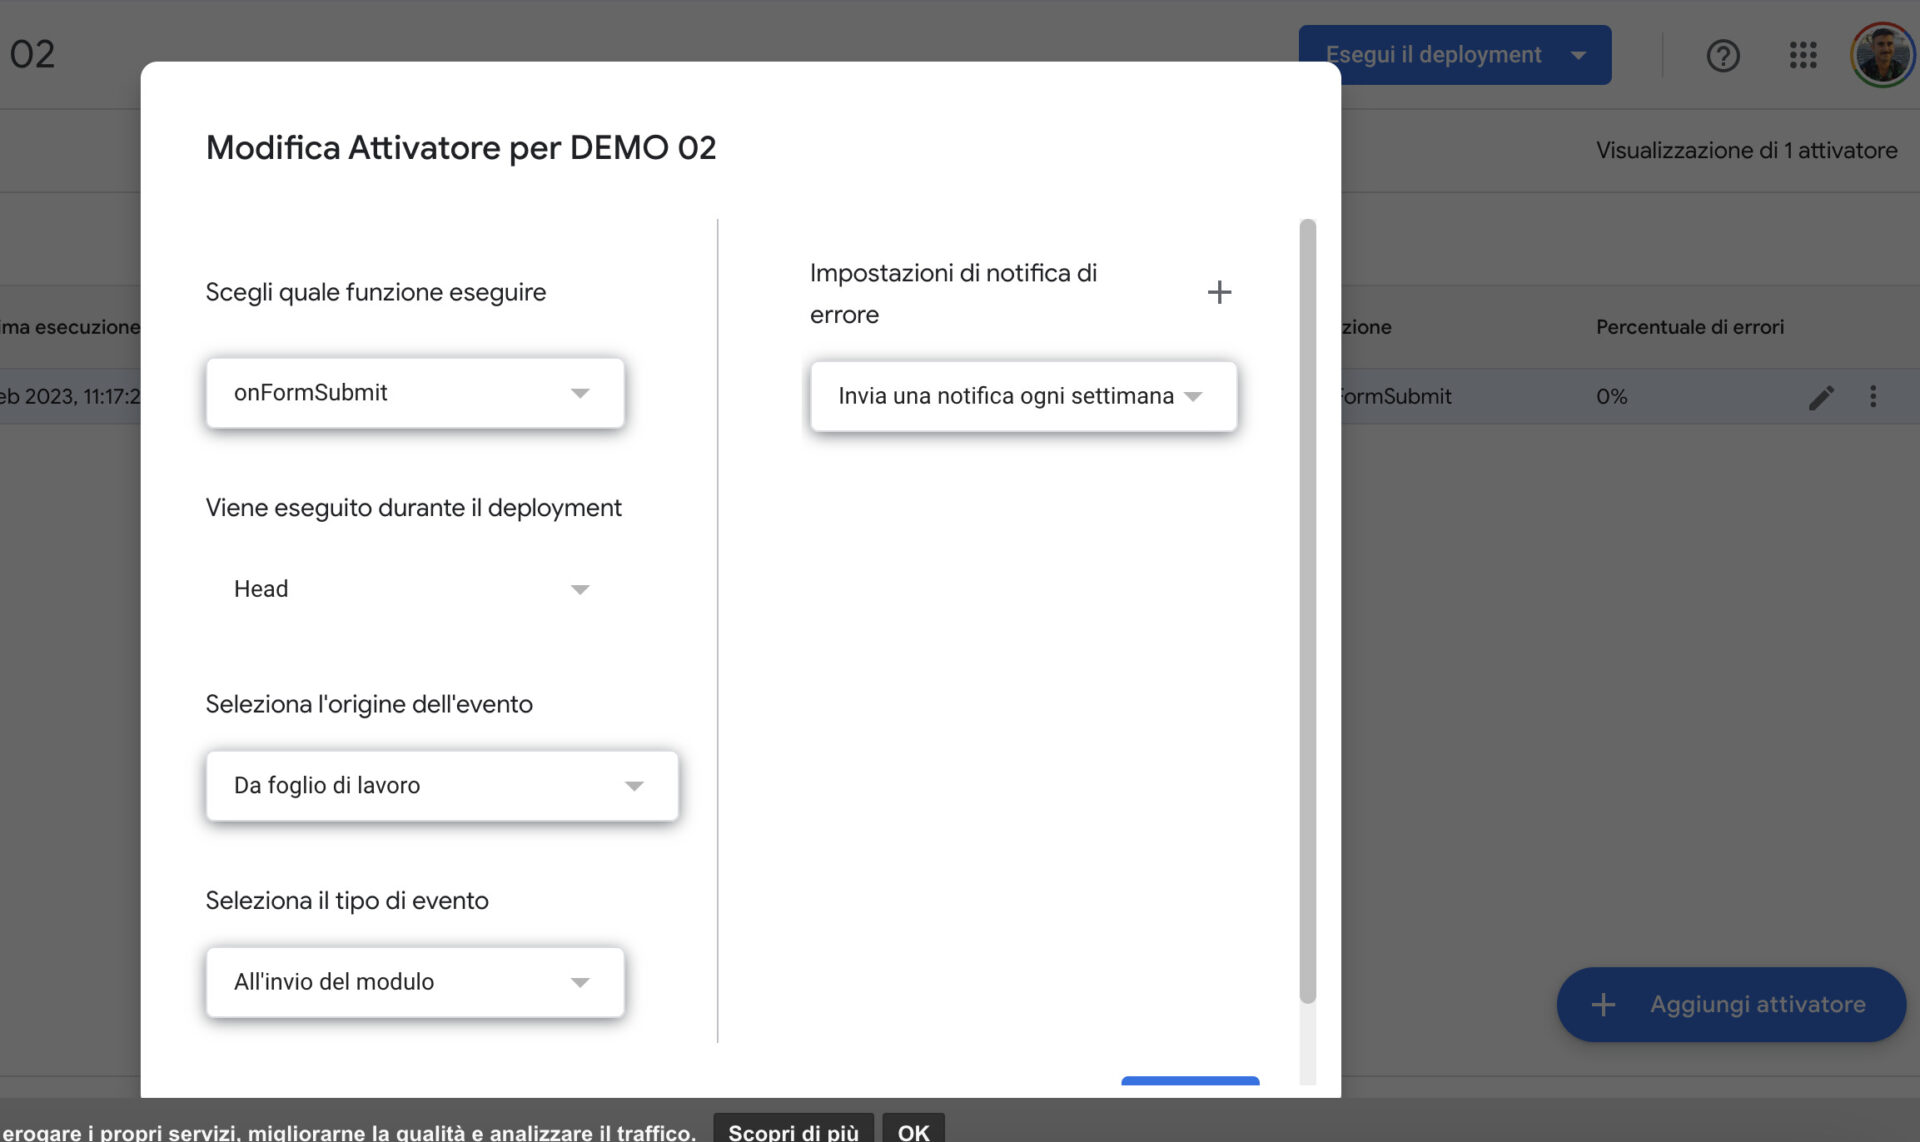
Now go to the Google App Scripts dashboard and select Triggers from your project

From the Triggers page, click on the Add trigger button
From the Select event type menu, choose On form submit and then Save. You can leave the other settings as default, but make sure they match those in the screenshot.
Done. Now our contact form is configured. The most important part remains, integrating it into our website.
How to Transform the Google Form into an HTML Form
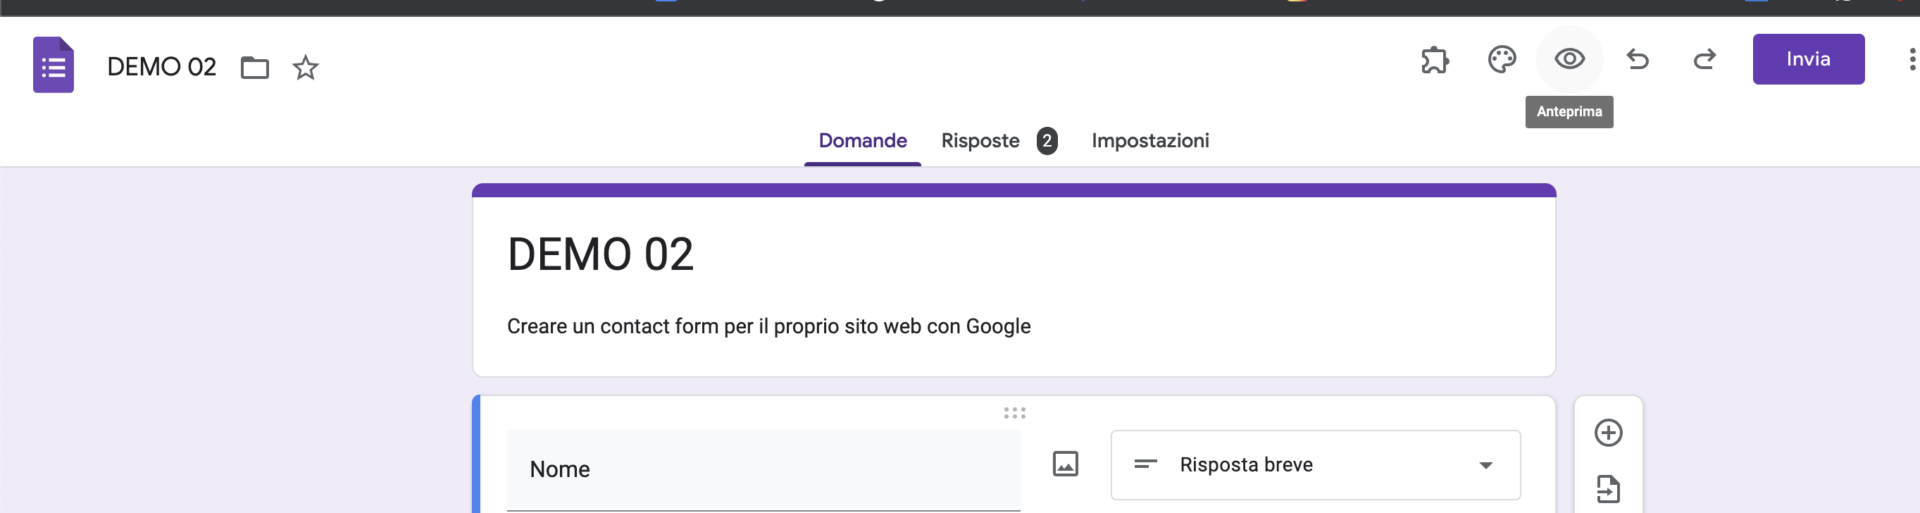
What needs to be done is to look in the HTML code of the questionnaire for the names of the fields and reproduce them on our HTML page. The process is quite simple, but for convenience, I recommend this very useful tool: just copy the preview link of your form, and the site will generate the code to copy/paste into your web page. You can see the form preview by clicking on the eye icon at the top right of your questionnaire.
Once you have copied the preview link, paste it on this website and then click Get the HTML


You just need to copy/paste the HTML and JS code into your website’s HTML page to see your working contact form.
The JS code needs to be slightly modified:
$('#bootstrapForm').submit(function (event) {
    event.preventDefault()
    var extraData = {}
    $('#bootstrapForm').ajaxSubmit({
        url: "https://docs.google.com/forms/d/e/1FAIpQLSeDbWVYwD9m8iv6GqgcHumwFQ4bVOgUFRonAnOJAfMeMWOk3A/formResponse",
        data: $("#bootstrapForm").serialize(),
        dataType: 'jsonp',  // This won't really work. It's just to use a GET instead of a POST to allow cookies from different domain.
        statusCode: {
            0: function(o) {
                console.log(0), console.log(o)
            },
            200: function(o) {
                console.log(200), console.log(o)
            },
            403: function(o) {
                console.log(403), console.log(o)
            },
            404: function(o) {
                console.log(404), console.log(o)
            }
        },
        error: function () {
            // Submit of form should be successful but JSONP callback will fail because Google Forms
            // does not support it, so this is handled as a failure.
            alert('Form Submitted. Thanks.')
            // You can also redirect the user to a custom thank-you page:
            // window.location = 'http://www.mydomain.com/thankyoupage.html'
        }
    })
})
Demo
You can see a demo of the form at this link.
We have seen how to create a contact form with Google for your website. For any questions, you can use the comments or email me. Have fun!
Leave a Reply